Key Takeaways
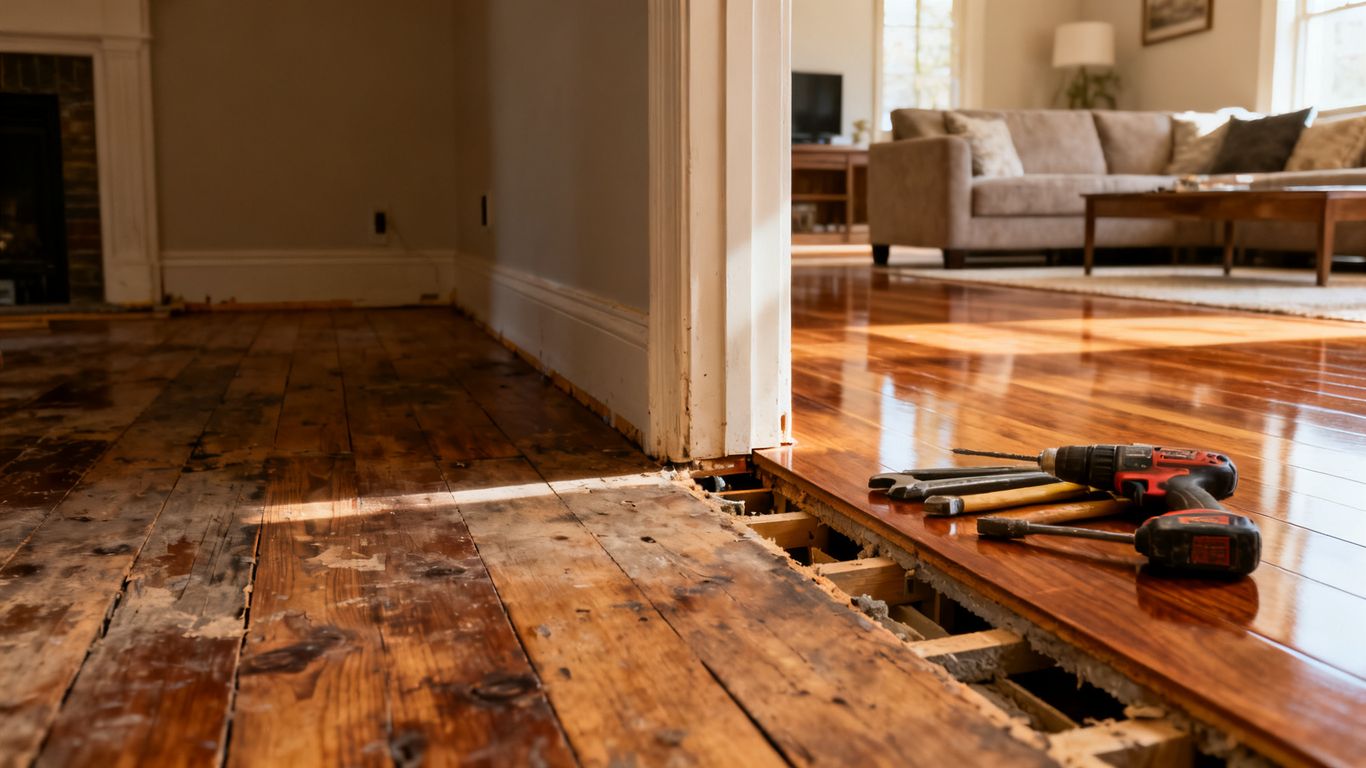
Before-and-after images give flooring businesses a practical way to show the work behind a finished room. A consistent, honest photo system also makes it easier for prospective customers to judge fit before they call.
- Photograph the same room from a similar angle before and after installation.
- Show the original problem, the work in progress, and the finished result.
- Use natural-looking images that are clear, current, and permissioned.
- Organize photos around real services, materials, rooms, and service areas.
- Connect visual proof to descriptions, landing pages, calls, and estimate requests.
Why before-and-after photos matter for a flooring company GBP
A flooring profile is often reviewed quickly, sometimes while a homeowner is comparing several local providers. Project images give that person something more useful than a polished showroom shot: evidence of the kind of work the company actually completes. The right sequence can make a service area, material choice, and finished standard easier to understand. It cannot guarantee rankings, but it can make the profile more credible and easier to act on.
How project photos support local relevance and trust
A real project image can connect a business to a recognizable service, room type, and local job pattern. A refinished hallway, a carpeted staircase, or a kitchen with newly installed tile gives visitors context that a generic stock image cannot. When the accompanying description is accurate, the photo becomes part of a clearer local story rather than a decoration.
That is why the phrase flooring company GBP before after photos is useful as an operational idea, not just a search term. The goal is to document completed work in a way that helps a nearby homeowner decide whether the company handles a similar project.
What homeowners look for before requesting an estimate
Most homeowners are not trying to inspect every technical step. They want quick answers: Does this company work in rooms like mine? Can it handle the condition of my existing floor? Does the finished work look neat around edges, transitions, stairs, and cabinets? Photos that answer those questions reduce uncertainty before the first conversation.
A useful image set also shows restraint. It does not promise a price, timeline, or result that the company cannot verify. Instead, it lets the visitor compare the original condition with the completed room and decide whether an estimate makes sense.
Why authentic jobsite images outperform generic flooring photos
Generic flooring images may be attractive, but they rarely prove who performed the work or what conditions the crew encountered. Jobsite images show the actual rooms, awkward corners, subfloor preparation, dust control, transitions, and finishing details that shape a flooring project. They also give sales teams material to discuss when a lead calls.
A practical publishing rhythm can begin with real operational events. This GBP post planning guide is useful when turning completed jobs, verified services, and project photos into accurate updates without overstating availability or results. The same discipline applies to photo captions: describe what happened, and leave out claims the image cannot support.
How photo quality can influence engagement without guaranteeing rankings
Sharp focus, balanced exposure, and a useful composition make it easier for someone to keep reviewing a profile. A dark image may hide the grain of a refinished floor, while an extreme wide angle can make a small room appear misleadingly large. Better images can improve attention and confidence, but no photo format guarantees a position in local search.
Clear evidence beats polish alone when a homeowner is deciding whether to request an estimate. Treat image quality as part of the customer experience, alongside accurate services, reviews, contact details, and a website that explains the next step.
The before-and-after format Google can understand
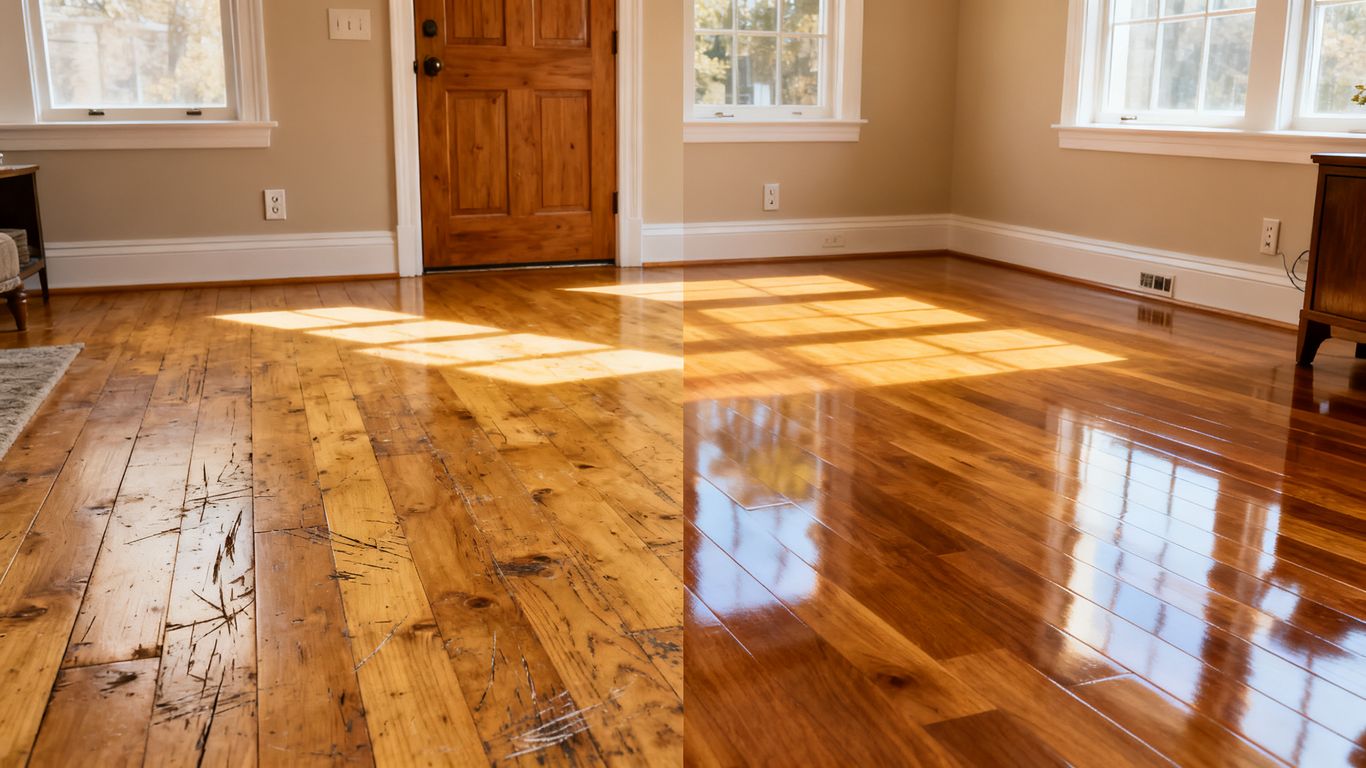
A before-and-after set works best when the relationship between the images is obvious. Start with the same room, then show the problem, the work, and the result without making visitors guess what changed. The images should be recent, permissioned, and representative of the company’s actual service mix. A simple sequence is usually more persuasive than a gallery assembled only around the prettiest finished rooms.
Pairing the same room from the same angle
Stand in roughly the same position for the first and final photographs. Keep the camera height and orientation similar, and include fixed features such as a doorway, window, cabinet, or stair rail as visual reference points. The comparison becomes much easier when the room itself—not the camera movement—explains the change.
Exact duplication is not always possible on a busy jobsite. Still, a consistent viewpoint gives the homeowner a fairer comparison and helps the finished image feel connected to the original condition.
Showing the flooring problem before installation
The first image should explain why the work was needed. Capture worn finish, stains, damaged boards, lifted carpet, cracked tile, uneven transitions, or a dated surface where those conditions are visible and appropriate to share. Avoid exaggerating minor flaws or photographing private belongings more prominently than the floor.
A useful before image creates a baseline. It gives the later installation photos a job to explain, rather than presenting the finished room as an unexplained transformation.
Capturing the finished result with consistent framing
The after image should be clean, bright, and wide enough to show how the flooring sits within the room. Leave the camera at a comparable height and include important boundaries such as baseboards, thresholds, islands, and stair edges. If furniture has been returned, make sure it does not conceal the work that matters.
Use a second finished view when one angle cannot show the full result. The goal is not to flood the profile with near-identical images; it is to provide enough context for a reasonable visual judgment.
Adding detail shots that prove workmanship and material quality
A close-up can support the wider room view by showing plank alignment, board variation, grout lines, stair noses, transitions, or a carefully finished edge. Detail shots are especially helpful when the service depends on precision that cannot be seen from across the room. They should remain recognizable and well lit rather than becoming abstract texture photographs.
Pair details with the room image so the viewer understands where they were taken. A close-up without context may look attractive, but it does less to explain the scope of the project.
How to photograph flooring projects for GBP
The best photo system is repeatable enough for a crew or office coordinator to use on every suitable job. It does not require expensive equipment; a modern phone, a steady hand, and a short checklist are often sufficient. Ask for permission before photographing a customer’s home and decide which spaces should remain private. Consistency matters more than producing a cinematic portfolio.
Choosing angles that make the transformation obvious
Begin at a room corner or doorway that captures the largest useful section of floor without stretching the perspective. Keep vertical lines reasonably straight, and take a second angle if a cabinet, island, or furniture blocks the main view. For stairs, photograph from both the top and bottom when the runner or tread work needs context.
Walk through the room before taking the shot. Remove loose tools and packaging, but do not rearrange the customer’s belongings merely to create a staged scene.
Using natural light and avoiding distracting edits
Daylight can reveal color and surface variation more honestly than a harsh phone flash. Open blinds when permitted, turn on consistent room lighting, and avoid mixing extreme color temperatures where possible. Basic cropping and exposure correction are reasonable; filters that change the apparent material color are not.
The finished image should look like the room a customer could actually visit. That standard protects trust when the homeowner later compares a sample, estimate, or completed installation with the photo.
Including scale, room context, and installation details
A room-wide frame shows scale, while a detail frame shows execution. Include a doorway, cabinet run, stair flight, or piece of ordinary furniture when it helps someone understand dimensions. Then capture the details that explain the trade work, such as transitions, seams, trim, or substrate preparation.
Keep the set focused. Three or four useful photographs usually communicate more than a long sequence of nearly identical angles, especially when the profile is being viewed on a phone.
Protecting customer privacy and removing sensitive information
Check mirrors, screens, mail, paperwork, family photographs, and visible addresses before publishing. Blur or crop sensitive details when permission does not cover them, and do not include people who have not agreed to appear. Customer consent should cover both taking the image and using it for marketing.
A simple internal review prevents avoidable problems. Someone other than the photographer can check that the room is approved, the image is accurate, and no private information has slipped into the frame.
What to include in each flooring company GBP before after photo set
A strong set tells a small project story without pretending to document every minute of the job. Think in stages: what the room looked like, what had to happen, how the installation progressed, and what the customer received. The exact number of images will vary by project, but the sequence should remain understandable. Descriptions should use only verified details about the service, material, and location.
Project type, flooring material, and service area
Name the actual service in plain language, such as hardwood refinishing, carpet replacement, tile installation, or concrete resurfacing. If the material is known and approved for publication, identify it accurately rather than using a broad label that could confuse the reader. A service area can be included when it is truthful and consistent with the company’s profile.
This is where a project photo becomes useful marketing data. It can help a homeowner recognize a relevant service without turning the caption into a string of city names or unsupported claims.
Preparation and demolition images that explain the work
Preparation photos can show removal of old flooring, surface repairs, moisture-related preparation where applicable, leveling, protection of adjacent spaces, or subfloor inspection. They explain why the finished result required more than simply placing a new surface over the old one.
Keep these images tidy and factual. A demolition photograph should clarify the job, not create the impression that every project involves the same steps.
Installation progress photos that demonstrate expertise
Progress images can show boards being laid, tile lines being established, carpet being stretched, or coating being applied. Photograph from a useful distance and include enough surrounding context to make the action understandable. Avoid publishing a moment that looks unfinished or defective unless it is clearly part of a normal documented sequence.
The best progress image supports the finished result. It helps a prospective customer see the care behind the appearance, particularly around transitions, corners, stair edges, and other difficult areas.
Finished-room images that show the customer outcome
Finish with a clean room view and, when helpful, one detail image. Show the relationship between the new floor and the walls, cabinetry, stairs, or fixtures around it. If the project involved more than one room, separate the views so the scope remains clear.
For a compact set, these four stages create a reliable editorial order:
- The original condition and visible flooring problem.
- Preparation, removal, or surface correction.
- A representative installation or finishing step.
- The completed room and one useful workmanship detail.
This sequence gives the viewer enough context to understand the work without turning a business profile into a construction diary.
How to upload and organize photos in Google Business Profile
Uploading is only one part of maintaining a useful profile. The larger task is deciding which images deserve attention, how they relate to the company’s real services, and when older work should be replaced. Create a small review process so a team member checks accuracy, permissions, and image quality before publication. That process becomes especially valuable when several crews or locations contribute photos.
Selecting the right images for the business profile
Choose images that are clear, current, and representative of the services the company wants to discuss. Lead with a recognizable room view, then add before, progress, and detail images that explain the project. A profile does not need every photograph taken on the job; it needs the few that make the work easiest to understand.
Rotate in new examples as the business completes different project types. A gallery filled with one nearly identical room may leave homeowners unsure whether the company handles stairs, kitchens, repairs, or larger installations.
Using accurate file names and relevant metadata
Use descriptive internal file names such as hardwood-refinish-entryway-before or tile-kitchen-installation-after when they help the team find and audit images. Names should describe what is actually shown, not add a city, material, or service that the image does not support. Keep metadata factual and avoid treating it as a substitute for a clear image or useful profile description.
The point is operational clarity. Accurate labels make it easier to locate permissioned images and prevent an office team from publishing the wrong project.
Organizing photos by service, room, and project type
A simple folder structure can separate hardwood, carpet, resilient flooring, tile, and coatings, with subfolders for before, progress, and after. Add the project date and general service area when internal policy allows. This makes future posts, landing pages, and sales conversations easier to support with the right visual proof.
If the business serves several locations, keep the service area tied to verified project records. A photo library should help staff retrieve evidence, not encourage them to guess where work occurred.
Avoiding duplicate, blurry, staged, or misleading images
Remove images that are out of focus, nearly identical, heavily filtered, or unrelated to the company’s actual work. Do not use a showroom photograph as though it were a customer installation, and do not present a rendering as a completed project. Accuracy matters more than filling every available gallery slot.
For businesses that handle coatings or resurfacing, this concrete coating GBP guidance offers a useful reminder to connect profile photos with real service information, project examples, and lead tracking rather than treating images as isolated decoration. Apply the same principle to every flooring category.
Before-and-after photo examples for common flooring services
Different flooring services require different visual proof. A refinishing project depends on surface condition and sheen; a stair runner depends on alignment and edges; a garage coating depends on preparation and coverage. The strongest sets adapt the camera work to the service instead of forcing every job into an identical template. Use the examples below as prompts, then publish only what the project actually shows.
Hardwood refinishing and floor restoration
Photograph the worn or faded boards before sanding, then capture a preparation or sanding stage only when the image is safe and representative. The finished view should show consistent sheen, board direction, and transitions to nearby rooms. A detail photograph can reveal how edges and thresholds were handled.
Avoid lighting that makes one section appear dramatically darker than another. Honest color and a stable viewpoint help the viewer understand the restoration more accurately.
Carpet replacement and stair runner installation
For carpet replacement, show the old surface, the cleared room, and the finished carpet with seams and edges visible where appropriate. Stair runner projects benefit from views up and down the staircase, along with a closer image of the runner’s alignment and fastening details.
Keep tools, loose fibers, and temporary protection out of the final frame. The finished image should show how the material fits the room and how the installation meets adjacent surfaces.
Luxury vinyl plank and laminate installation
A useful set can show the original floor, preparation around doorways or cabinets, a section of the plank layout in progress, and the completed room. Include a transition or edge detail when it demonstrates a decision homeowners commonly ask about. Room-scale photographs are particularly helpful because plank direction and pattern are easier to judge in context.
Do not imply that every project has the same subfloor requirements or installation method. Describe only the steps completed on that job.
Tile, bathroom, and kitchen flooring projects
Tile projects benefit from images that show layout, spacing, cuts around fixtures, and the finished relationship between floor and cabinetry. In a bathroom, protect privacy and keep personal items out of frame. In a kitchen, include enough room context to show how the tile connects with islands, appliances, or adjacent flooring.
A close-up of grout and edge work can supplement the wide view, but it should not replace it. Homeowners need to see both precision and proportion.
Garage floor coating and concrete resurfacing
For a garage or concrete project, photograph the original stains, cracks, or worn surface when appropriate, followed by preparation and the finished coating. A wide view can show coverage and layout, while a detail shot can show flakes, texture, or the edge at a wall or threshold if those features are part of the work.
This garage flooring profile guide covers the broader role of accurate categories, service details, real project photos, and ongoing profile maintenance. The photo lesson is straightforward: show the actual surface before and after, and avoid making a coating look uniform by editing away meaningful variation.
How to turn GBP photo content into flooring leads
Photos rarely create a lead by themselves. They support the moment when a homeowner decides to call, visit a website, or request an estimate. Make the next action easy and ensure the visual proof agrees with the service descriptions, service areas, and landing pages behind the profile. From a paid media perspective, this also gives the sales team a clearer creative library for campaigns and remarketing.
Connecting photos to GBP services and project descriptions
When a project image supports a listed service, describe the relationship plainly. A caption might identify the room, the completed service, and the material, provided each detail is verified. Avoid attaching a hardwood photo to a carpet service simply because both belong to the same business.
Consistency matters across the profile and website. If a company promotes refinishing, installation, and repairs, the images should help visitors distinguish those offers rather than blending them into one vague promise.
Using photo updates to support Google Posts and review requests
A completed project can become a factual photo update, then serve as a prompt for a review request after the customer has approved the work. Keep the update specific and current, and avoid asking a customer to mention a particular keyword or outcome. The image should support the story, not pressure the reviewer.
For a marketing team, a verified project queue is more useful than a calendar full of invented themes. Each approved job can supply a photo, a short description, and a natural reason to contact the business.
Matching visual proof to local landing pages and paid campaigns
Send traffic to a page that continues the same conversation as the image. A carpet replacement photo should not lead to a generic homepage if a relevant carpet service page exists. Likewise, an ad for garage coating should use landing-page images that reflect the coating types and project conditions the business actually handles.
A broader local flooring lead strategy can help connect profile activity with organic visibility and lead generation. For paid campaigns, track each landing-page path and creative variation separately so strong-looking images do not receive credit for leads they did not influence.
Measuring views, calls, direction requests, and estimate submissions
Record profile photo interactions alongside calls, website clicks, direction requests, form completions, and booked estimates. Compare periods with fresh project imagery against periods with little activity, but avoid treating a correlation as proof that one photograph caused a sale. Sales notes and call recordings can add useful context when attribution is incomplete.
A practical review asks whether the image library is producing better conversations, not merely more uploads. If visitors view projects but do not contact the company, inspect the service match, call-to-action, landing page, response speed, and estimate process.
Start With Better Project Proof
If your flooring team needs a clearer path from project photos to estimate conversations, set up a focused marketing consultation and decide which services, images, and follow-up actions should work together. Book a call when you are ready to review the next step.
Conclusion
A flooring company GBP before after photos system works when it documents real work with consistent angles, honest descriptions, and a clear connection to the services homeowners are considering. The result is not a ranking promise; it is a more useful profile that helps the right visitor understand the project and take the next step.
Frequently Asked Questions
How many before-and-after photos should a flooring company upload?
There is no universal number. Start with a small, coherent set that includes the original condition, a meaningful progress image, and one or two clear finished views rather than uploading every photograph from the job.
Should the before and after photos use the exact same angle?
Use the same or a closely matched angle whenever possible. Fixed room features help viewers compare the two images, but a second angle may be useful when the first view hides an important part of the work.
Can stock flooring photos be used on a business profile?
Stock images may create general visual interest, but they do not prove that the company completed a particular project. Real, permissioned jobsite photographs are more useful for communicating experience and setting expectations.
Should captions include the city where the project took place?
Include a service area only when it is accurate and appropriate for the business. Captions should prioritize truthful project details over repeated location phrases or keyword stuffing.
What should be removed from a flooring project photo?
Remove or crop private paperwork, addresses, computer screens, family photographs, and people who have not granted permission. Also remove images that are blurry, misleading, heavily edited, or unrelated to the service.
Do before-and-after photos guarantee better local rankings?
No. Photos can improve clarity and engagement, but rankings depend on many factors and cannot be guaranteed by a particular image format. Treat project photography as one part of a broader local marketing system.
How can flooring companies connect photos to estimate requests?
Match each photo set with an accurate service description, a relevant landing page, a clear contact option, and a trackable follow-up process. Review calls, forms, direction requests, and booked estimates together to understand whether the visual proof is helping qualified prospects move forward.