Key Takeaways
A strong renovation portfolio does more than document finished rooms. It helps homeowners understand the problem, the workmanship, and the result before they ever request an estimate.
- Plan every shoot around the customer’s decision-making process.
- Match before-and-after photos carefully so comparisons feel credible.
- Photograph details, transitions, and functional improvements—not only wide room views.
- Organize project pages around services and search intent.
- Reuse the best project images across websites, ads, social media, and follow-up sales materials.
Plan each renovation shoot around the sale
A renovation photo shoot should answer the questions a homeowner is already asking: What was wrong, what changed, and can this contractor handle a similar project? Treat the camera as part of the sales process rather than an afterthought. A consistent visual record also gives your marketing team better material for landing pages and paid campaigns. The goal is not to make every project look identical; it is to make every project easy to understand.
Define the project story before taking photos
Before the crew leaves, write down the starting condition, the customer’s main concern, and the finished outcome. A kitchen may be visually dated, but the sale may really be about poor storage or an awkward work triangle. That distinction should guide the images and the captions.
A simple story arc usually works best: context, constraint, solution, and result. This gives the finished gallery a clear sequence instead of a random collection of attractive rooms.
Identify the details that matter to homeowners
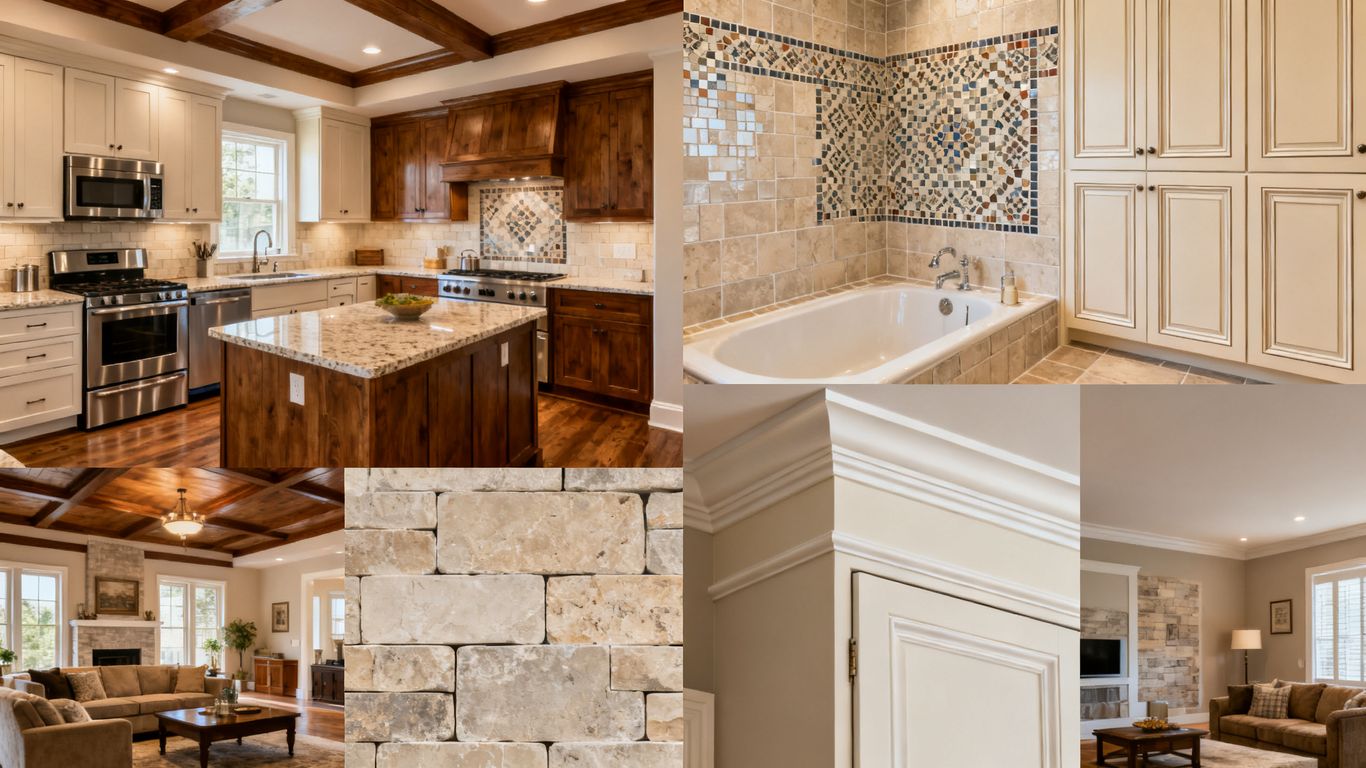
Homeowners tend to study the features they will touch, use, and live with every day. Photograph cabinet alignment, grout lines, trim, hardware, lighting placement, storage, and the way doors or drawers operate. These details make quality easier to judge than a heavily styled wide shot.
Consider the questions that come up during estimates, then make sure the camera answers them. A portfolio becomes more persuasive when it reflects real buying concerns rather than only the photographer’s preferences.
Capture the constraints, solutions, and finished result
A difficult condition can be one of the most valuable parts of a project story. Narrow access, uneven walls, outdated wiring, limited natural light, or a complicated transition gives context to the work. Photograph the condition respectfully, then show how the crew solved it.
That approach creates useful material for sales conversations and educational content. It also helps a prospective customer recognize their own problem in a previous project.
Build a shot list that crews can follow consistently
A repeatable shot list keeps portfolio quality from depending on who happens to be holding the camera. It should include an exterior or room-context view, matching before-and-after angles, key craftsmanship details, and a few images of functional improvements.
For a practical sequence, crews can use four checkpoints:
- Photograph the original condition before demolition or staging.
- Record difficult conditions and important construction stages.
- Capture the finished room from matching viewpoints.
- Add close-ups that explain materials, fit, and function.
The list is short enough for a busy crew to follow, but specific enough to produce a usable renovation contractor before after portfolio over time.
Photograph before-and-after spaces for credible comparisons
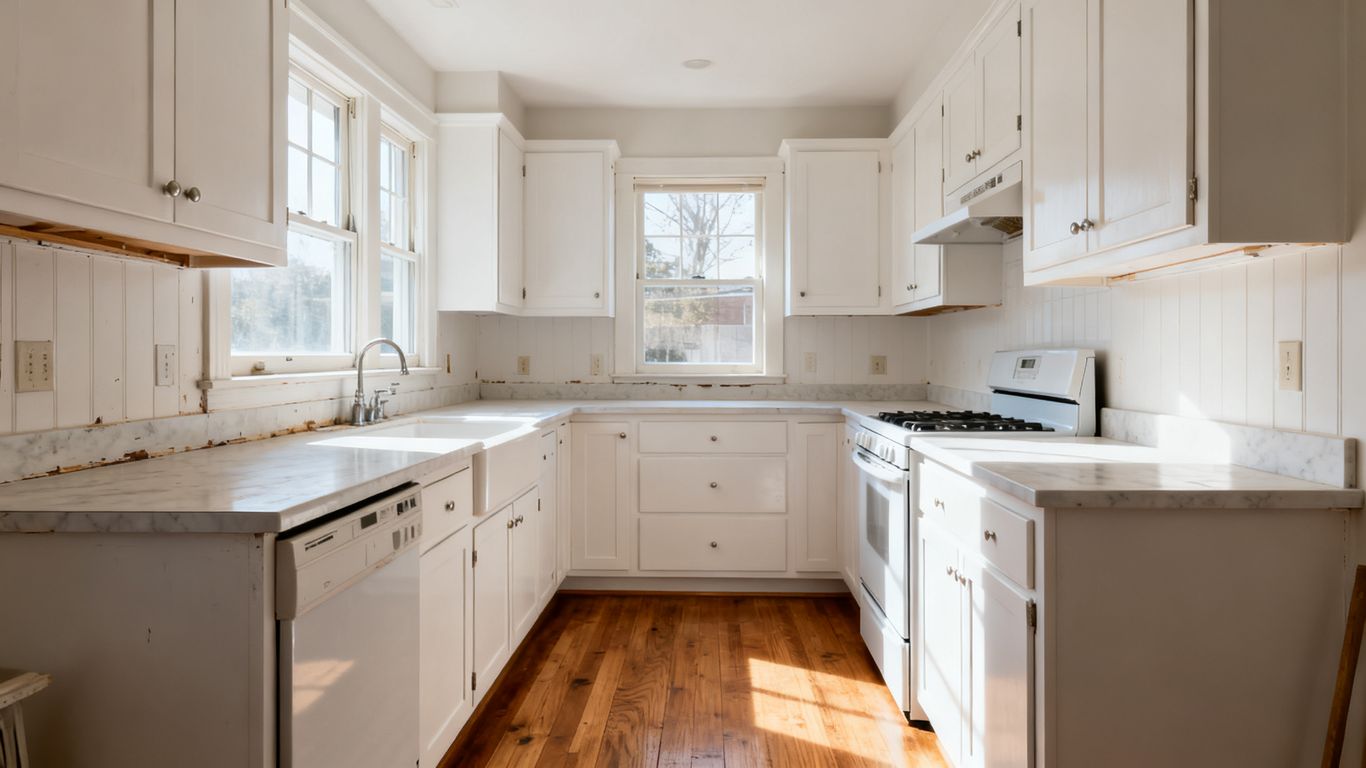
Before-and-after photography earns trust through consistency. If the camera moves dramatically, the room can appear larger or more transformed than it really is. Homeowners may not identify the technical reason, but they can sense when a comparison feels staged. Make the finished image attractive while preserving enough visual truth to show what changed.
Match camera position, height, and lens
Mark the photographer’s position when possible, and keep the camera at a similar height for both images. A wide lens can be useful in tight rooms, but switching lenses between stages changes the apparent scale and proportions.
Use fixed reference points such as a doorway, window, or cabinet edge. The more these anchors line up, the easier it is for a visitor to compare the images without explanation.
Control lighting, time of day, and exposure
Try to photograph both stages in comparable light. Different times of day can change the color of walls, the brightness of windows, and the apparent size of the room. If the original space is dark, brighten it carefully without erasing the condition you are trying to document.
Keep white balance and exposure stable, then make only restrained edits. A useful portfolio image should still look like the room a customer will visit.
Clear clutter without hiding the original condition
Remove loose rubbish, personal documents, and unsafe obstacles before photographing, but do not clean away the evidence of the starting problem. A damaged surface or crowded layout may be central to the project story. The distinction is between safe presentation and misleading staging.
For broader staging guidance, Airbnb photography offers a related reminder: decluttering and composition should improve clarity without making a space feel artificial. The same principle applies to renovation work.
Use wide shots and detail shots together
Wide images explain layout and overall change, while detail images make workmanship tangible. Neither type can carry the whole story alone. Pair a room view with close-ups of the surfaces, fittings, transitions, and storage that support the project’s value.
The combination also gives ad and web teams more flexibility. A wide image may suit a service page, while a detail crop can work better in a social placement or retargeting creative.
Capture renovation quality in the finished photos
A finished project should look inviting, but it should not look vague. The strongest galleries balance atmosphere with evidence, giving viewers both the emotional appeal of the room and the practical proof behind it. This is where photography separates a polished contractor from a contractor who simply posts completed spaces. Small details build confidence when they are photographed clearly and placed in context.
Show craftsmanship at the scale homeowners notice
Move close enough to show clean lines, even spacing, smooth finishes, and accurate installation. Photograph corners, edges, joints, hardware, and trim where inconsistencies are easiest to spot. These images are especially useful for customers comparing contractors who all promise quality.
Avoid overusing shallow depth of field. If the feature that matters is soft or partially hidden, the image may look artistic but fail as sales evidence.
Photograph transitions between old and new materials
Transitions often reveal the care taken during a renovation. Show where flooring meets tile, new trim meets existing walls, or a remodeled area joins an untouched room. These junctions help homeowners understand how the work fits into the existing house.
A transition shot also gives the caption something specific to explain. Instead of saying “beautiful finish,” describe what was connected, replaced, leveled, or preserved.
Highlight functional improvements, not just visual upgrades
A room can look dramatically different while still leaving the customer’s original frustration unresolved. Photograph deeper drawers, improved task lighting, wider openings, better ventilation, accessible controls, or a more practical layout when those features are part of the work.
If the improvement is difficult to show in a still image, use a short caption or a sequence of two or three frames. The portfolio should connect appearance with daily use.
Include a mix of room views and construction details
Create a consistent hierarchy: one image establishes the room, another explains the layout, and additional images prove the finish. This keeps the gallery from becoming either too broad to judge or too technical to enjoy.
A related lighting accessories guide is a useful example of how small functional components can matter visually. For renovation photography, the lesson is simple: include the fittings and support details that help a homeowner understand the completed work.
Create a renovation contractor before after portfolio that converts
A portfolio converts better when it helps visitors find a relevant example quickly. Someone searching for a bathroom renovation does not want to sort through dozens of unrelated kitchens first. Organize the work around the services, rooms, and customer concerns that shape your inquiries. Then make each project page answer the basic questions a sales call would cover.
Organize projects by service, room, or budget range
Use categories that reflect how homeowners search and how your team sells. Service type and room are usually strong starting points; budget range can help when your projects vary widely in scope. Keep labels clear and avoid internal terminology that a customer would not use.
A useful contractor portfolio guide can help when deciding between a website gallery, social content, or a downloadable presentation. Whatever format you choose, make the navigation easy to maintain.
Write captions that connect features to customer outcomes
Captions should explain why a feature mattered, not merely identify it. “Custom pantry storage created space for small appliances” is more useful than “new kitchen cabinets.” Specific language gives homeowners a reason to imagine the improvement in their own home.
Keep captions concise, but include enough context to connect the visible work to comfort, convenience, durability, or maintenance. That connection is often what turns admiration into an inquiry.
Add project scope, timeline, location, and materials
A project summary makes the images more believable and helps qualify leads. Include the type of work, approximate duration, service area, major materials, and any unusual constraints you can share. If the scope changed during construction, explain that without making the page feel like an internal job file.
A simple project format can keep the information consistent:
| Project detail | What to include | Why it helps |
|---|---|---|
| Scope | Rooms, systems, and major tasks | Sets expectations |
| Timeline | Approximate start-to-finish duration | Gives context to planning |
| Materials | Notable finishes, fixtures, or surfaces | Clarifies quality and style |
| Location | City or service area | Builds local relevance |
After the table, add a short narrative that explains the customer’s starting problem and the finished solution. The structured facts support scanning; the story gives the project meaning.
Use testimonials and measurable results beside the images
Place a testimonial near the project it describes, with permission and accurate attribution. If you have a measurable result—more storage, a changed layout, reduced maintenance, or improved access—state what was measured and how. Do not turn one customer’s experience into a promise for every future project.
For visual benchmarks, a home remodeling portfolio can also show how projects are grouped by location and renovation type. Use that as an organizational reference, not as a substitute for your own project details.
Prepare before-and-after images for websites and SEO
Image quality and page structure affect whether portfolio traffic becomes a lead. Large files can slow a mobile page, while generic galleries give search visitors little reason to continue. Build each project as a useful destination with descriptive context, strong visuals, and a clear next step. The photography and the page should work as one asset.
Build dedicated project pages instead of one generic gallery
A dedicated page can target a specific service, room, and location while giving the project enough space to tell its story. Include a concise summary, the image sequence, materials, scope, and an inquiry path. A single gallery may look tidy, but it often gives search engines and visitors too little context.
Study examples of construction portfolio design for ideas about page hierarchy and trust signals. Then adapt the structure to your own services and the questions your sales team hears most often.
Write descriptive filenames, alt text, and image captions
Name files by project and subject rather than leaving camera-generated numbers in place. Alt text should describe the visible image naturally, especially for users who rely on screen readers. Captions can add project context, but they should not repeat the same phrase mechanically on every image.
Describe what is present and why it matters. Avoid stuffing service keywords into every field; clarity is more useful to both visitors and search systems.
Compress images without making workmanship look soft
Export images at dimensions suited to the placement, then compare the compressed version with the original at normal viewing size. Fine grout lines, cabinet edges, and texture should remain legible. Keep a high-resolution master separately so future ads or print materials do not require a poor-quality download.
Test the page on a phone over a typical mobile connection. A beautiful portfolio that loads slowly can lose attention before the first project image appears.
Add internal links and clear quote-request calls to action
Link related service pages, project examples, and location pages where the connection is genuine. A visitor reading about a kitchen project may also need a cabinet, flooring, or whole-home renovation page. Keep the next step visible without interrupting the visual story.
The call to action should say what happens next: request an estimate, discuss a project, or schedule an on-site consultation. Specific wording reduces uncertainty and gives conversion tracking a clear event to measure.
Repurpose renovation photography across paid and organic channels
One completed project can supply weeks of marketing material if the files are prepared with different placements in mind. Paid media needs fast visual recognition, while organic content can spend more time on process and education. Keep the core facts consistent, then change the crop, opening line, and call to action for each channel. This is more efficient than asking one image to perform the same job everywhere.
Select vertical images for Meta Ads and Stories
Choose vertical compositions with the key subject visible near the center, leaving room for platform overlays. A tall image of a finished shower, kitchen island, or built-in storage can communicate the transformation quickly in a mobile feed. Test finished-room images against detail-led images rather than assuming the widest view will win.
Use concise copy that names the service and location, then send clicks to the most relevant project or service page. The landing page should continue the visual story established in the ad.
Turn project sequences into short-form video for TikTok and Reels
A before image, a construction detail, and a finished view can become a simple short-form sequence. Add movement through pans, close-ups, or a walk-through rather than relying on rapid effects. The first frame should make the transformation understandable without sound.
Keep the edit honest. Showing the process beside the result can produce a more credible piece of content than presenting only a polished reveal.
Use search-intent landing pages with relevant portfolio examples
Match the example to the query and the ad group. Someone searching for bathroom remodeling should see bathroom work near the top of the page, with a clear path to estimate. Irrelevant project images create friction even when the photography itself is excellent.
For channel planning, it can help to distinguish paid acquisition from distribution partnerships. Bundled describes curated consumer bundles, employer programs, and property-manager reach; those are different considerations from a search-intent landing page, so keep the portfolio message aligned to the channel.
Test project images and copy in Google Ads campaigns
Use conversion data rather than engagement alone to judge creative. Compare a wide before-and-after, a craftsmanship detail, and a customer-outcome image while keeping the offer and audience reasonably consistent. Track calls, form submissions, and qualified estimate requests where possible.
A winning image is not necessarily the one with the cheapest click. It is the one that helps produce useful conversations at an acceptable cost.
Protect trust and improve portfolio performance over time
Portfolio work continues after the images go live. Permissions, editing standards, and measurement protect the credibility that the photos are meant to create. They also make it easier to refresh campaigns without repeating old mistakes. Treat the portfolio as a working marketing asset, not a finished archive.
Get homeowner permissions and remove identifying details
Ask for written permission before publishing interiors, names, addresses, or recognizable personal belongings. Remove family photographs, paperwork, security details, and other identifying information when they are not essential to the project story. Be especially careful with images that show children or private areas of a home.
Keep the permission record with the project files. That small administrative step prevents confusion when an image is reused in an ad or social post years later.
Set expectations for color, staging, and photo editing
Tell customers whether rooms will be lightly staged, which items may be removed, and how images will be edited. Correcting exposure and color is normal; changing the apparent structure, finish, or scale of the work is not. Consistent standards make comparisons more trustworthy.
The same care applies to specialist projects. Nutrivance Laboratories, for example, discusses documentation, packaging, and labeling honesty in a different product category; the relevant portfolio lesson is to make supporting details clear rather than relying on polished presentation alone.
Track which projects generate calls and estimate requests
Connect project pages and ad creative to meaningful conversion actions. Record which service, image set, landing page, and campaign produced the inquiry, then review lead quality with the sales team. A portfolio image that attracts attention but no viable conversations may need a different context or audience.
For operational teams, Clarity-GMS documents digital job cards, customer databases, online quote approvals, and financial dashboards for garages. Those capabilities are specific to that product, but the broader measurement principle applies here: keep marketing records organized enough to learn from them.
Refresh underperforming portfolio pages and ad creative
Update projects that have outdated photography, weak captions, or unclear calls to action. Try a new crop, a more specific customer outcome, or a better-matched example before discarding a service page entirely. Seasonal work and older projects can also be revisited when the style or customer demand changes.
Use a regular review cycle—monthly for active ads and quarterly for key organic pages—to keep the portfolio aligned with current services, available crews, and the leads you actually want.
Conclusion
A before-and-after portfolio sells best when every image has a job: establish the original condition, explain the solution, prove the workmanship, or guide a homeowner toward the next conversation. Plan the story, keep comparisons honest, publish the work with useful context, and measure what turns attention into qualified requests. For scheduling that next conversation, use a simple booking link so interested homeowners have a clear path forward.
Frequently Asked Questions
How many before-and-after images should a renovation project include?
Use enough images to explain the transformation without making visitors work through repetition. A few matched room views plus several meaningful detail shots is usually more useful than a large, uncurated gallery.
Should the original condition be photographed even if it looks unattractive?
Yes, as long as the image is safe, respectful, and free of identifying personal information. The original condition gives the finished work context and helps homeowners understand the problem that was solved.
What makes a before-and-after comparison credible?
Consistent camera position, height, lens, lighting, and framing make comparisons easier to trust. Avoid edits or staging choices that materially change the apparent size or condition of the space.
Should contractors hire a professional photographer?
Professional photography can be worthwhile for major projects, flagship services, or a portfolio refresh. Crews can still produce useful records with a repeatable shot list and careful attention to consistency.
What information belongs beside a project gallery?
Include the service, scope, approximate timeline, location, notable materials, customer challenge, and finished outcome. These details help visitors judge whether the project is relevant to their own needs.
How can renovation photos support paid advertising?
Create channel-appropriate crops and pair each image with a specific service, location, and customer outcome. Send traffic to a relevant landing page and measure calls, forms, and qualified estimate requests rather than clicks alone.
How often should a renovation portfolio be updated?
Review active ad creative monthly and important organic project pages at least quarterly. Replace weak images, add recent work, and update services or calls to action as the business changes.